Site and Map-Based Delineation
During survey preparation, the exact location of the area to be inspected must be specified.
On the TreeDetect interface, the user can provide the site by name, coordinates, or interactively on a map.
Entering the Site Location
- Site name: a freely definable name (e.g., "Budapest, Northern Forest Stand").
- Coordinates (latitude, longitude): the centre point of the area can be entered in decimal degrees.
- Coordinates update automatically when a new area is selected on the map.
Automatic town name lookup:
Based on the area selected on the map, the system automatically retrieves and fills in the settlement name in the project data (e.g., "Town: Balatonfüred").
This information is included in the project metadata during saving, making it available for filtering and searching.
Selecting an Area on the Map
The interactive map enables precise area delineation:
- Search box: zoom to any location by name or coordinates.
- Polygon drawing: polygons can be created using the tool in the top-right corner of the map.
- Points and lines: individual points or boundary lines can also be added to define the area.
- Area calculation: the system automatically calculates the area of the selected polygon (in hectares).
✅ Advantage: After selection, the coverage of the flight is immediately visible.
⚠️ Important:
During planning, it is highly recommended to select a slightly larger area than the one you intend to survey. This ensures that every edge of the area is safely captured with proper overlap during the flight!
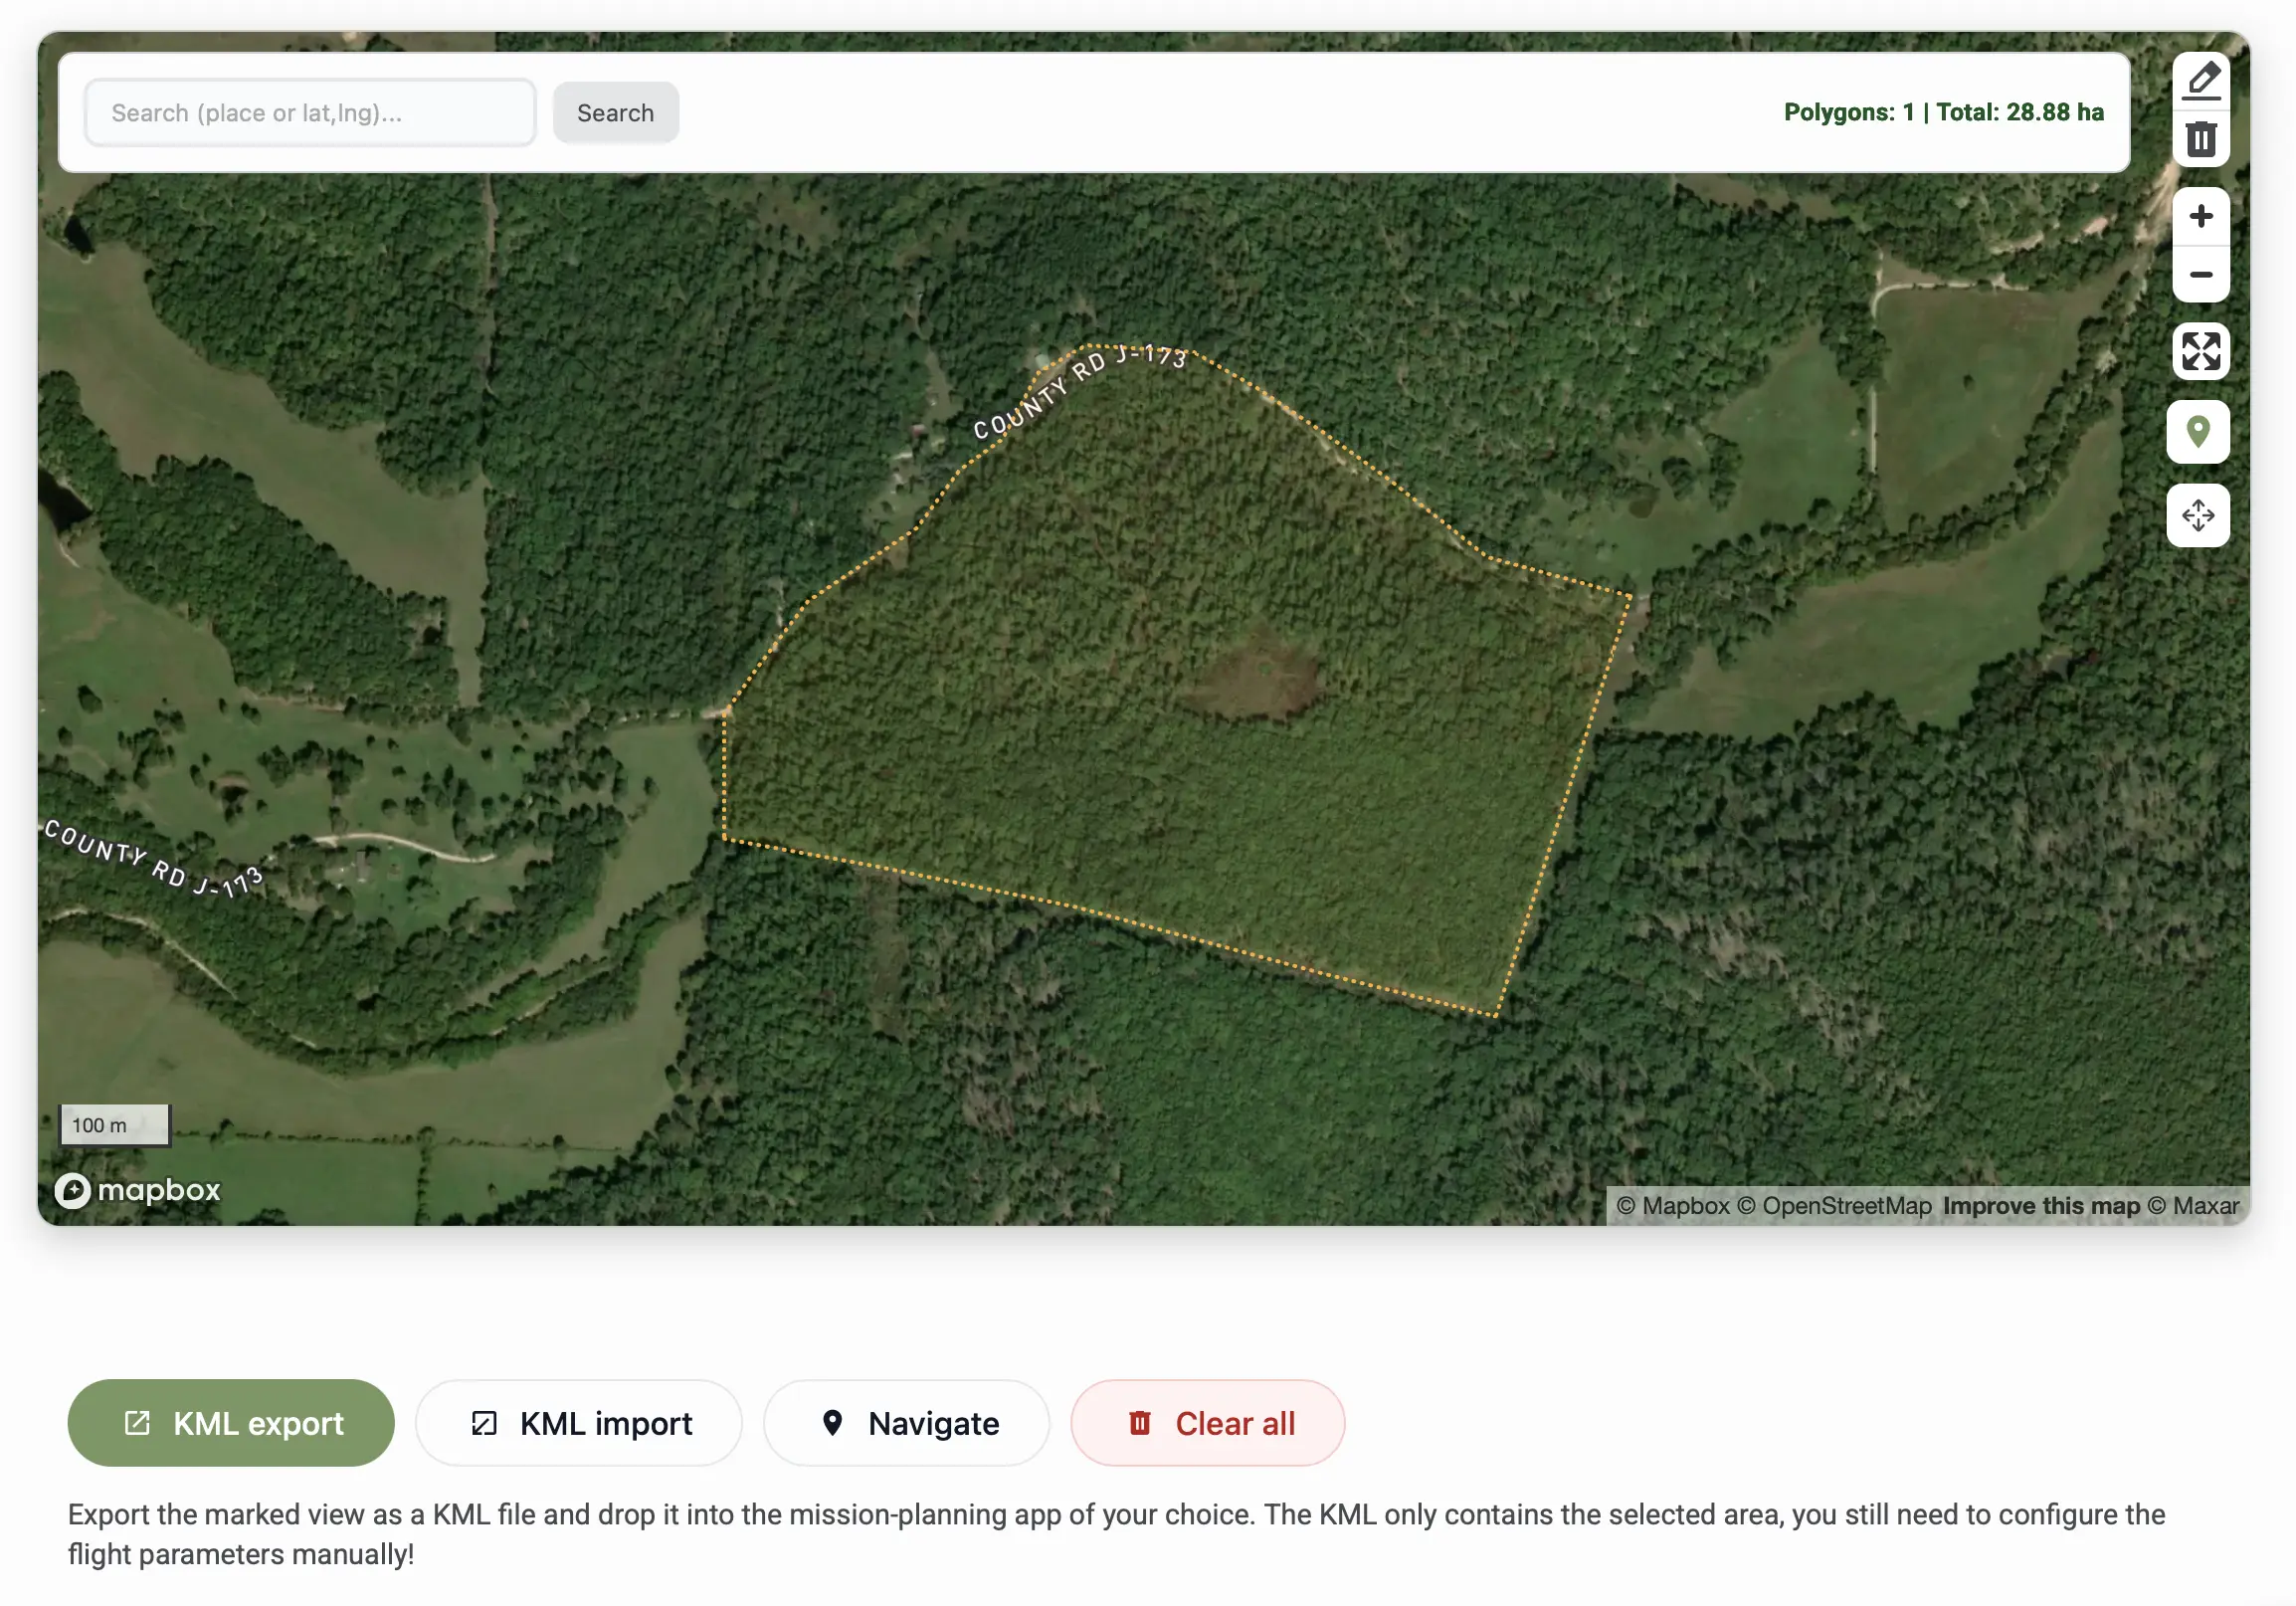
KML File Import
If the boundaries of the survey area are already available as a KML file, there is no need to manually draw the area on the map. TreeDetect supports KML file upload, from which the system automatically reads and displays the boundaries on the map.
- Quick setup: the existing KML file can be easily uploaded, allowing planning to continue immediately
- Precise boundaries: the area appears exactly according to the coordinates stored in the file
- The imported area can be edited just like a manually drawn one
✅ Advantage: If you already have an accurate boundary file, the KML import lets you configure the survey area in seconds.
Route Planning
After selecting the area, TreeDetect also offers a route planning feature that helps plan the navigation to the site.
- The map displays a suggested route from the starting point to the survey area
- Assists the drone pilot in reaching the site, especially for hard-to-access locations
✅ Advantage: Route planning helps the pilot prepare in advance for reaching the survey site.
Project Name and Forest Code
For easier project identification, a forest code can also be entered on the planning interface.
- Project name: a freely chosen name (e.g., "Csopak, Southern Stand").
- Forest code (optional): the official code of the forest stand (e.g., "E12B3" or the format used by your organisation).
Automatic name completion with forest code:
When a forest code is entered, the system automatically appends the code to the project name in parentheses.
Example:
, Project name:Gyulaj
, Forest code:Gyulaj 130/C
, Saved project name:Gyulaj (Gyulaj 130/C)
KML Export
The selected area can be exported as a KML file with a single click.
This file can be directly imported into popular flight planning applications such as DJI Pilot 2, DroneDeploy, or other flight planning tools.
The KML file contains the exact boundaries of the area, which can be used to plan the flight path.
⚠️ Warning:
The KML export only saves the selected area boundaries. Flight parameters must be set by the user in the flight planning software, based on TreeDetect's recommendations.